

Where To Buy Fairy Garden Supplies Near Me
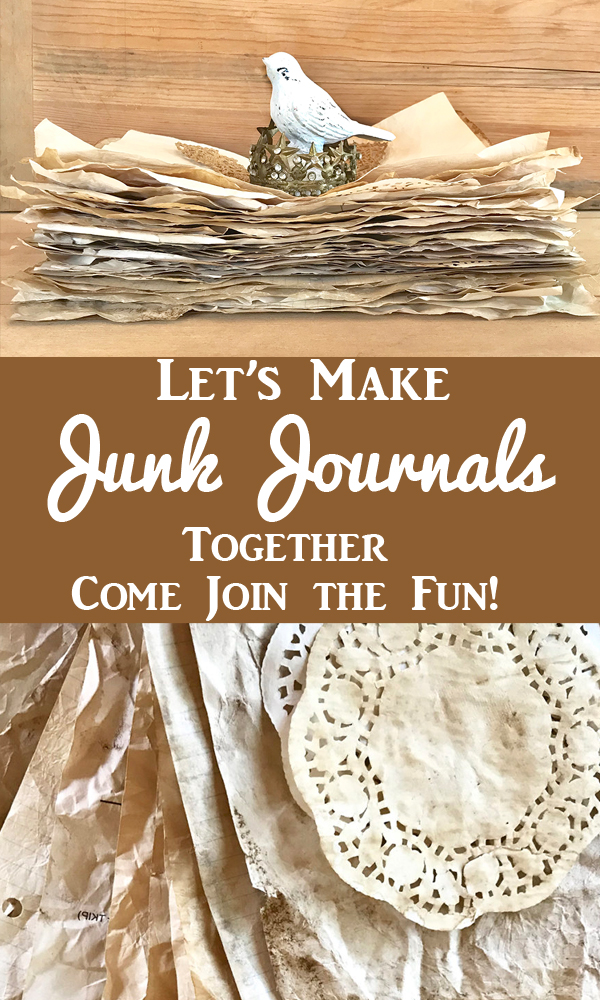
How to Make a Junk Journal
A Free Online Junk Journal Course with a French Travel Theme just for you!
Do you love crafting and DIY projects? Do you have a wanderlust in your heart for France, but no time or money to make it happen? I'm about to change all of that. Join me on this journey through Paris as we weave together the best of French travel traditions with the art of journaling! It's free and there are no deadlines- just get started right away! This is a series of 8 blog posts that will show you from start to finish how to Make a Junk Journal! You'll find lots of tips and techniques, free Printables and more to so that you can create your own Vintage Junk Journal. Ajunket is a pleasuretrip, often funded by someone else. How amazing is that? Would you like to take a junket with me?
This post may contain affiliate links which won't change your price but will share some commission, you can find our privacy policy here.
Hello, my artful Mixed Media friends. My name is Rebecca E. Parsons, also known as Cre8tiva, and I am a life long journaler. It's one of many creative things I love to do. I want to extend a very special invitation to you.
Please join me
on a Special Fantasy Junket & Junk Journal Journey
kindly paid for by The Graphics Fairy
Well, at least she will be supplying the 'Oh So Very French' images and ephemera we will be creating with. Together over the next few months we will fashion a Travel inspired book called, 'My Vintage French Junk Journal!'How cool is that? (You can call your anything you like…no pressure to name yours the same as mine.)
How My Junk Journal Series Works
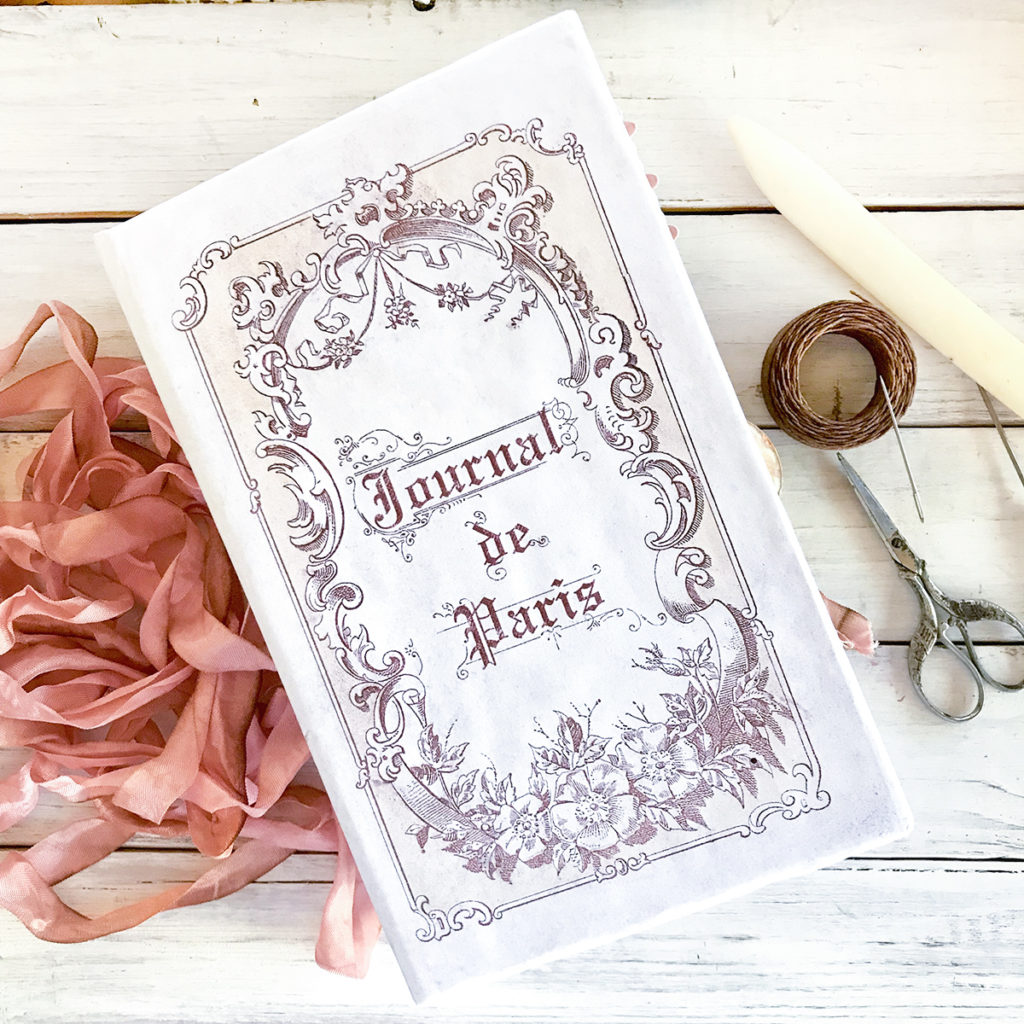
Welcome to our Junk Journal Journey . Today I am sharing the first in a series of tutorials of a vintage bound junk journal capturing an imaginary trip to France in a bygone era. Twice each month I will be sharing a new 4-page layout that you can copy exactly or use as inspiration for your own version. We will finish with three signatures filled with magical pages that tell the story of our imaginary travels together. In the final tutorial we will bind My Vintage French Junk Journalusing a super fun, and easy to do, binding technique.
I just flat out love making books… I have been creating them, large and small, for many years. I have mastered some difficult binding techniques and created a few of my own bindings. I even created a case bound book, one that looks and feels like a hard bound one you buy at any book store. That was a doozie and a story to tell at a later time.
Anyway, I am thrilled that Karen agreed to this wild idea of creating a Travel Inspired Junk Journal with you. I hope to have a 'sort of ' virtual gallery showing of all of our books and see/hear what stories you have to tell at the end. Are you ready to take a journey with me? Let's begin by discovering what a Junk Journal is…
What is a Junk Journal?
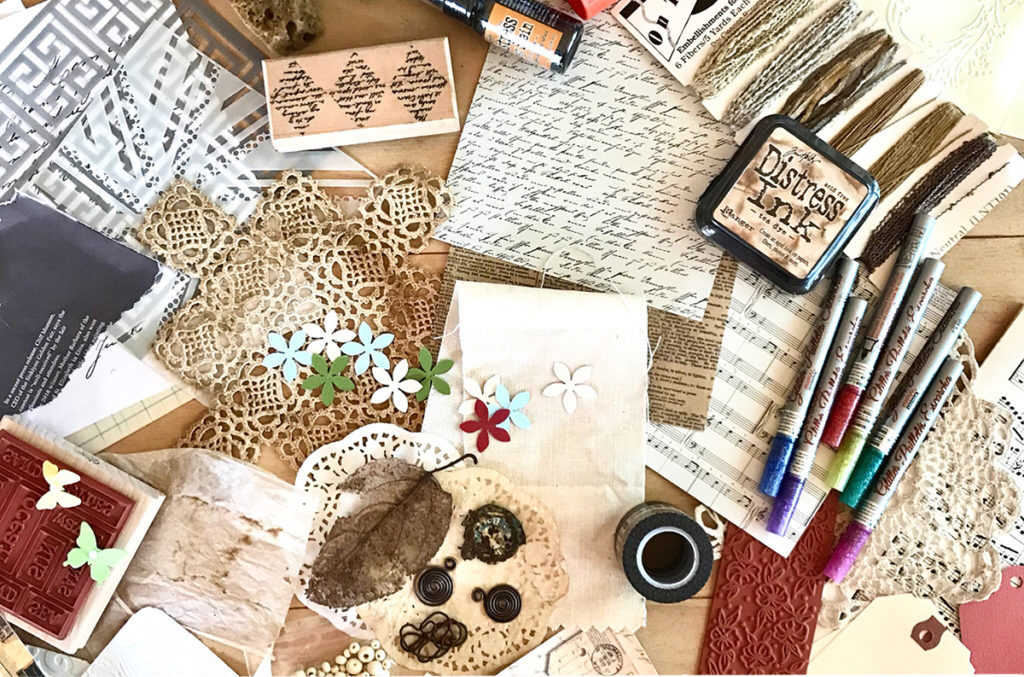
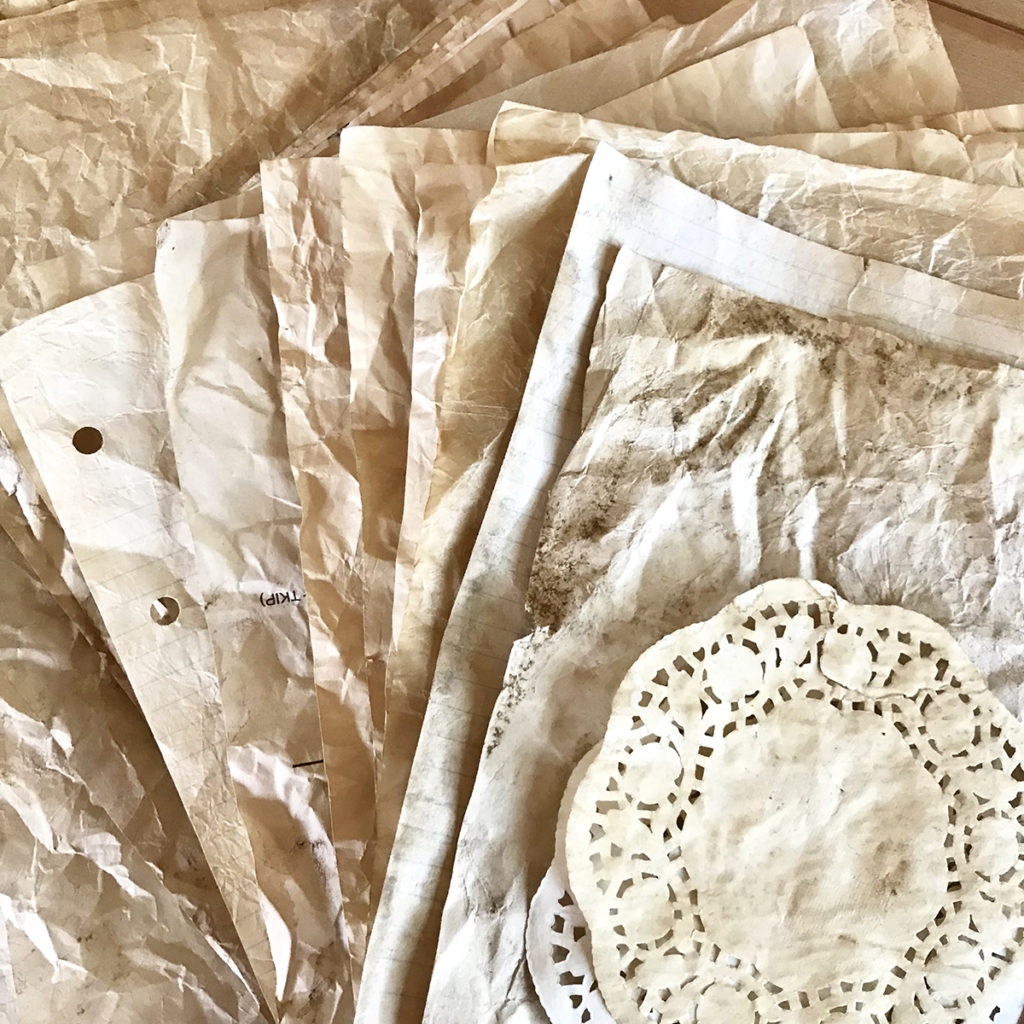
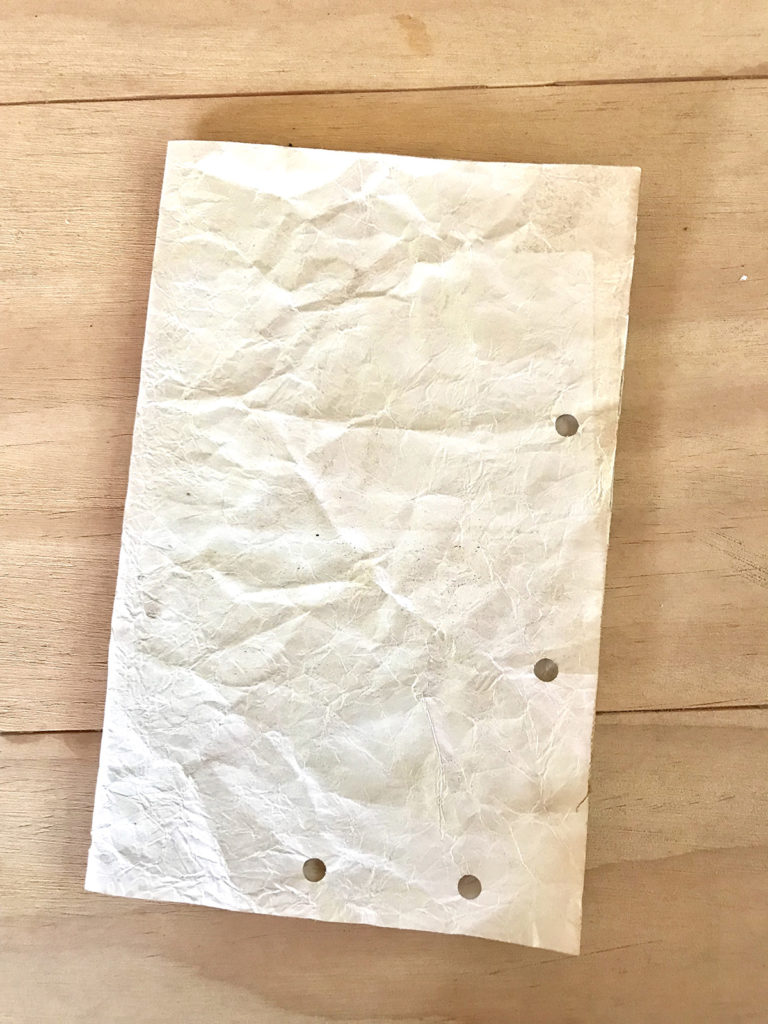
For those of you who may not have heard of this phenomena, a junk journal is a bound book created with things you have on hand that otherwise might end up in the recycling bin or the landfill. Those pieces of junk mail, catalogs, old greeting cards, appointment cards, magazines…almost anything can be used to make beautiful pages in order to create a junk journal treasure! You can also incorporate bits of fabric, buttons, sheet music, ledger pages, rusty things, nature finds…truly anything goes. You can see I have quite a stash in the photo above. I bet you have a similar stash! 😉
Our journal will recap an 'imaginary' exploration of Paris including day trips to surrounding points of interest. In June we will begin by arriving in France and taking in all the new sights, smells and sounds. We are off on day trips to Versailles and the Loire Valley in July. The River Seine, The Left Bank, and Brocantes will fill our heads in August. In September we return home to review our travels and bind our memories. Does this sound like fun? Then join in the mixed media merry making explorations with us. You can see some of the ideas with our TGF ephemera below. But there is so much more to do…stenciling, stamping, tearing, aging, inking, dyeing, crumbling, cutting, scoring, accentuating, embellishing…you get the picture!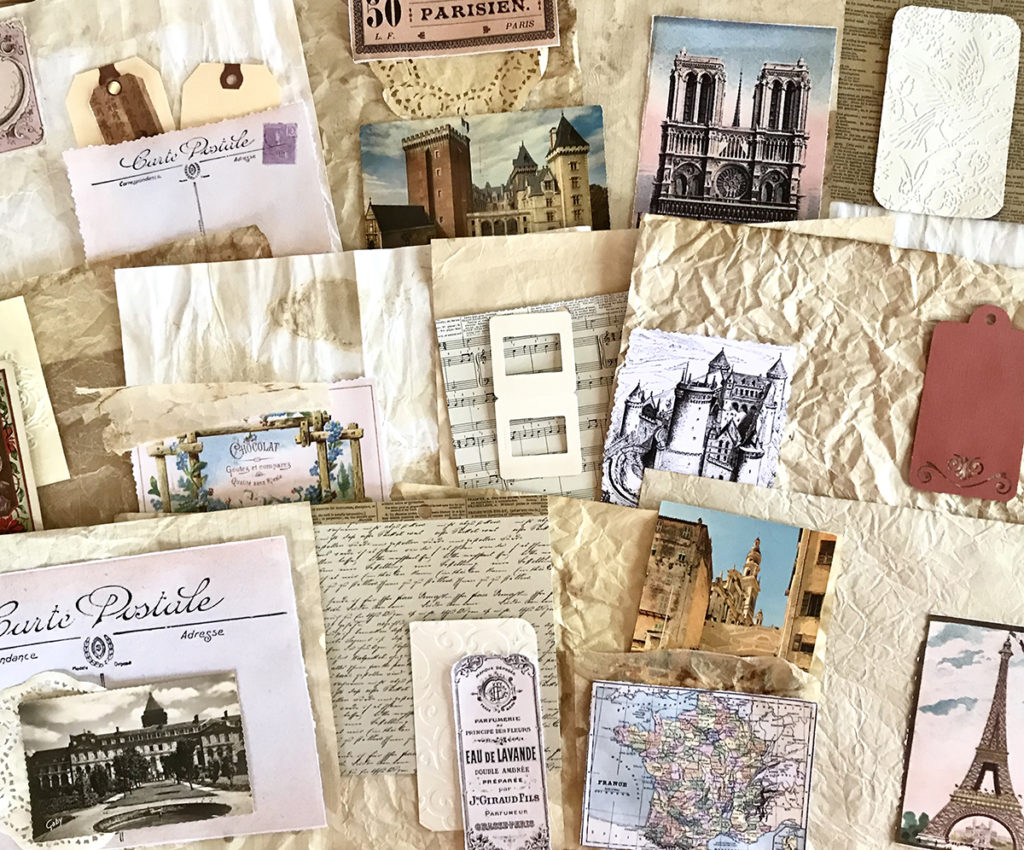
What Size Will Our Junk Journal Be?
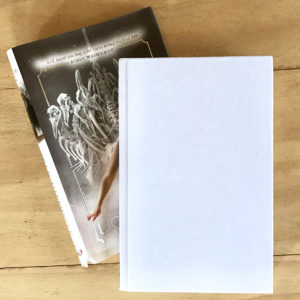
Let's get started by deciding what size our junk journal will be. Your junk journal will be the size of the book cover you decide to use. Our pages will be trimmed to fit approximately 1/4″ smaller on the outside edges of the cover you chose. So, it can be any size you wish it to be. We will talk more about the cover later in this tutorial. My cover measures 5-3/4″ wide by 8-3/4″ tall and is 1″ deep. I found it at Dollar Tree.
Everyone has access to regular copy paper. Therefore, the easiest size to accomplish quickly is an 8-1/2″ by 11″ piece of paper folded in half on the longest side to form a 5-1/2″ by 8-1/2″ signature. Although I prefer to use a heavier weight paper in my journals, you can go with what you have handy. Remember, you can recycle junk mail letters that are this size too. You can find a Junk Mail Tutorial HERE by Heather Tracy. Be creative. Now, let's get dirty…I mean let's get our vintage on. 😉
How do I make the Junk Journal pages look vintage?
My favorite trick to have instant age is to stain the papers using coffee or tea. While tea gives a more delicate vintage effect, coffee gives a darker, richer, sort of sepia look to papers. I use both. My favorite method is soaking paper in a shallow cookie sheet filled with tea. I use about 4 tea bags per cup of water. You can use more or less, just play to find the look you like. I also save the tea bag itself to add to the pages for texture and the tea inside to make a texture paste. Below you can see I also spattered random drops on some after they had dried. Just note that the paper becomes very fragile when soaked with liquid. Use care when picking up wet papers.
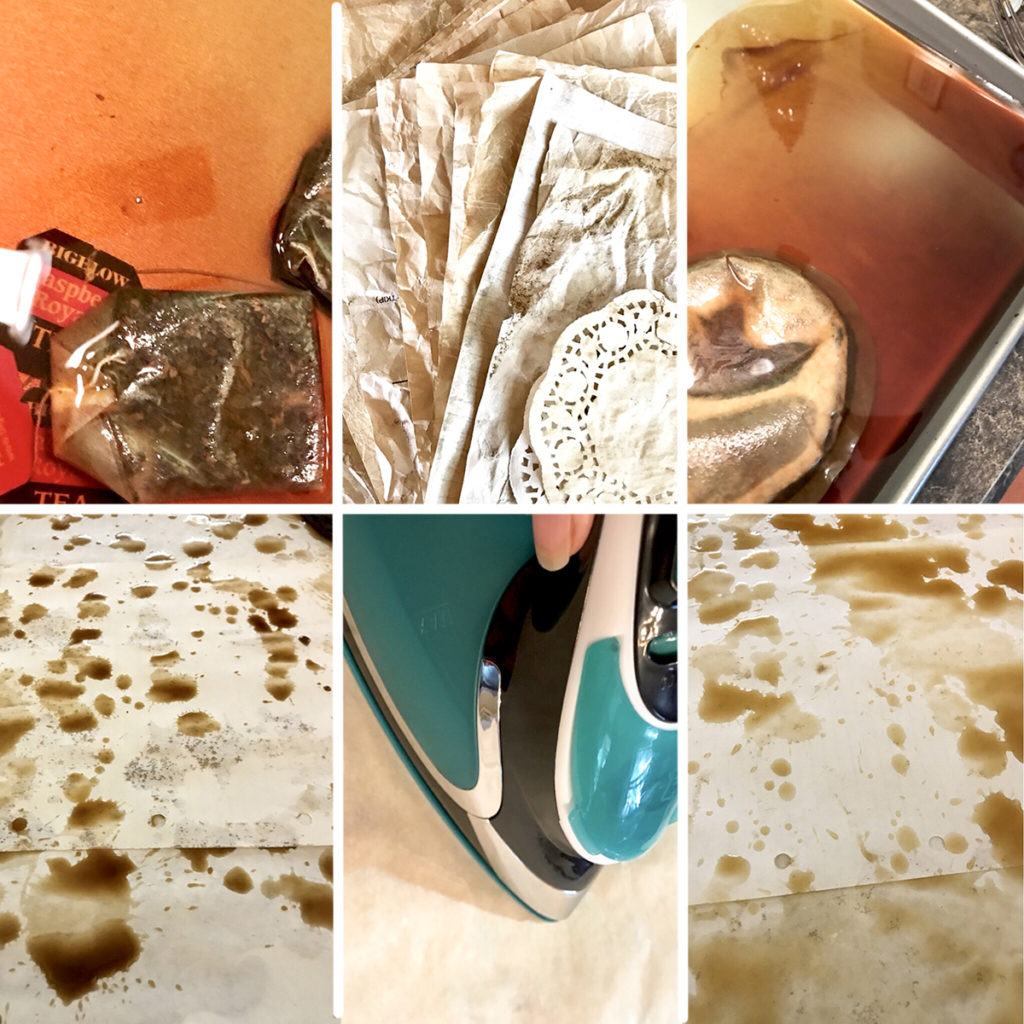
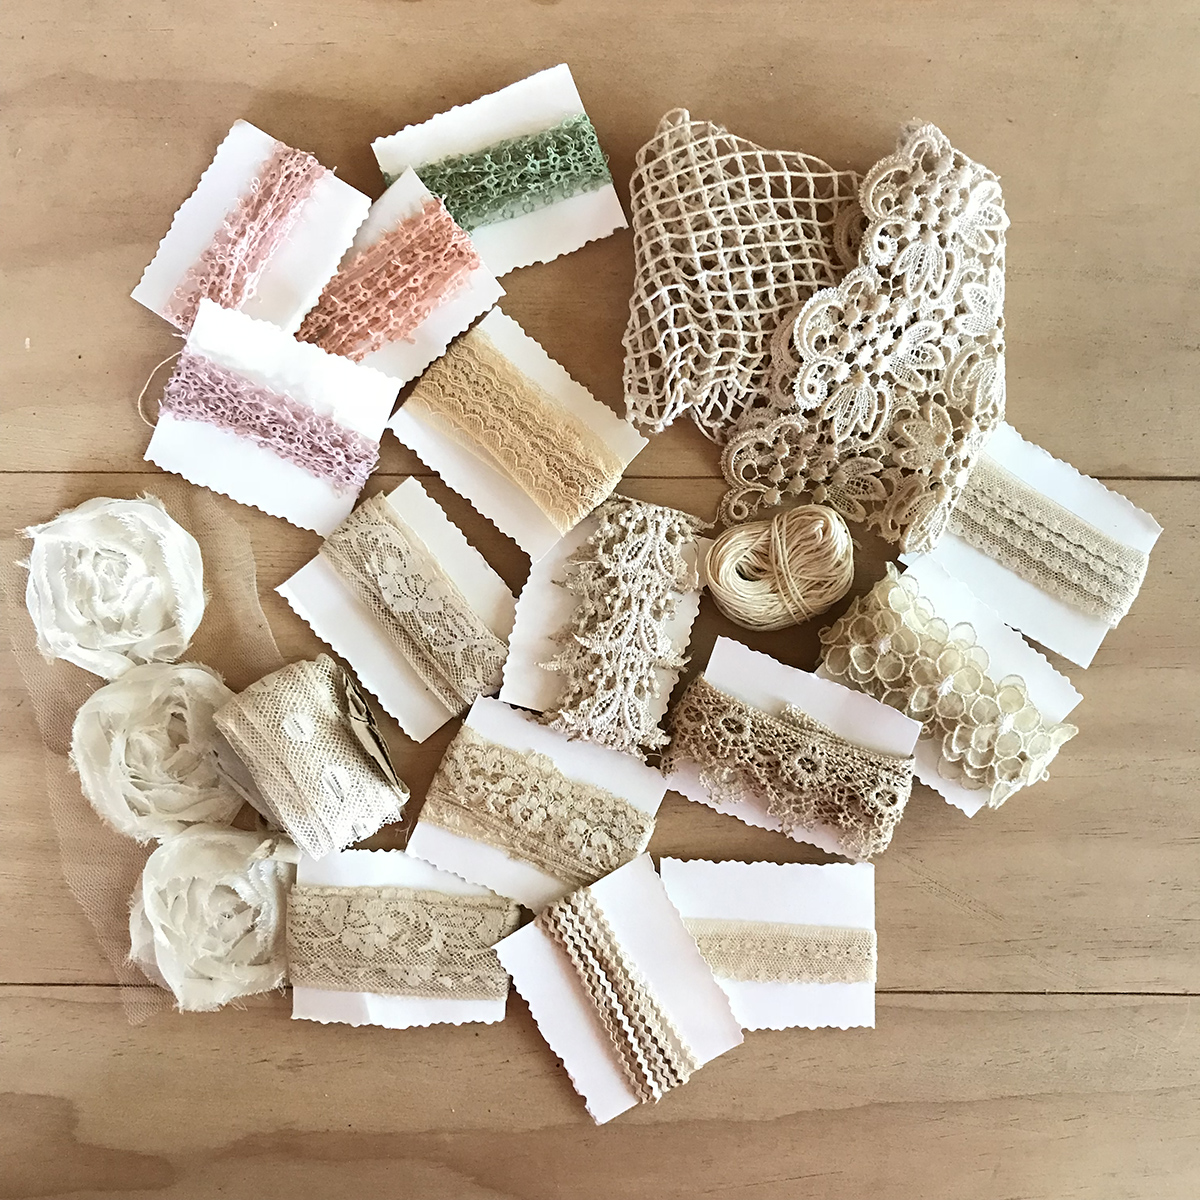
With coffee, I just brew a cup or pot and sprinkle or pour it over sheets laid on a cookie sheet with a lip. I have even heard of people baking the paper at a low oven temp like 225º. But I just douse mine and let it sit a while (15-30 minutes). I sometimes sprinkle the coffee grounds on the paper too. Just play with this part. There is no one correct way. The longer you leave the paper in the tea or coffee, the darker it becomes. So make it look as aged as you like. Don't forget envelopes, tags, ephemera, and fabrics. Stain them while you are at it. Here are some of the lace and ribbon I stained for our book. For a slightly different version of this technique, check out the Ancient Parchment Paper Technique HERE.
Texture
I like a lot of texture on my pages. Sometimes, I roll the pages around the tea bags and squeeze like wringing out a washcloth. At other times, I wad them tightly into a ball while they are wet, then straighten them out flat to dry. I sometimes iron the pages for a smoother surface and more refined look. The possibilities…. I expect you will develop a few of your own aging techniques if you fall in love with making books and junk journals…like I have. Please share them with us here.
How to Make Junk Journal Pages
In this lesson our task is to create three signatures, or sets, of four sheets of 8-1/2″ by 11″ paper and prepare the cover (see next section). That is 12 sheets of paper total. By create, I mean age using any of the coffee or tea techniques above. You might want to add a couple of extra sheets for pockets or just in case you mess something up, but messes are embraced in junk journals. That is part of the fun. There is NO right way to make a junk journal and there are NO mistakes…that means NO pressure to be perfect. Trust me, even simple aged papers bound into a book look beautiful. So let's have fun with this journey!
Find an Old Book for Your Cover
Find an old book in a thrift store (see my Dollar Tree book above) if you don't already have one. It can be any book old or new. We will make the cover look old and vintage. The spine should be about an inch or so wide to hold our three signatures. We need to separate the book block or the pages from the cover. The book covers attached by the spine is what we want when we are finished with this process. Let's separate the covers from the book block first. To do this, stand the book upright with the covers wide like below.
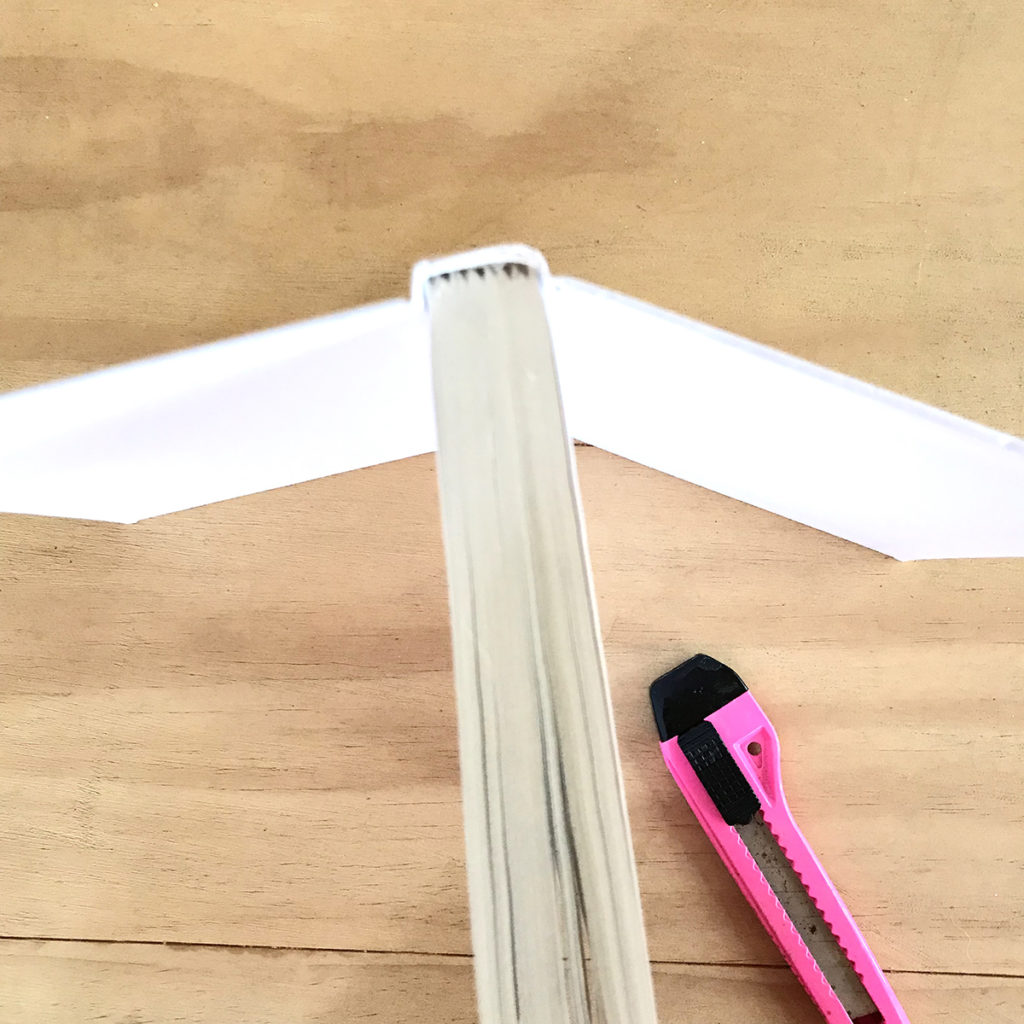
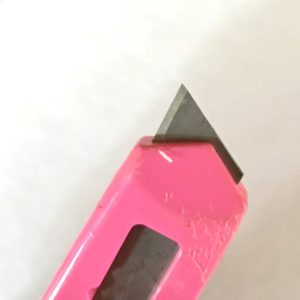
I use a box cutter and adjust the blade to be very short. Cut gently into the crease where the pages join the cover with a sharp craft knife. Be careful not to go too deep and cut into the spine. There will probably be bookbinding cloth, which looks like thick gauze, or paper in cheaper books like mine to cut through. It may take several passes to accomplish this.
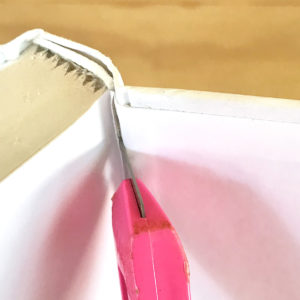
Go slowly and make shallow cuts in the crease while pulling the paper apart as you go. Be patient. Nik the Bookbinder has a great video showing the process if you want a more visual look before you begin. Just don't become mesmerized by all the videos and forget to return here. We have much more to do…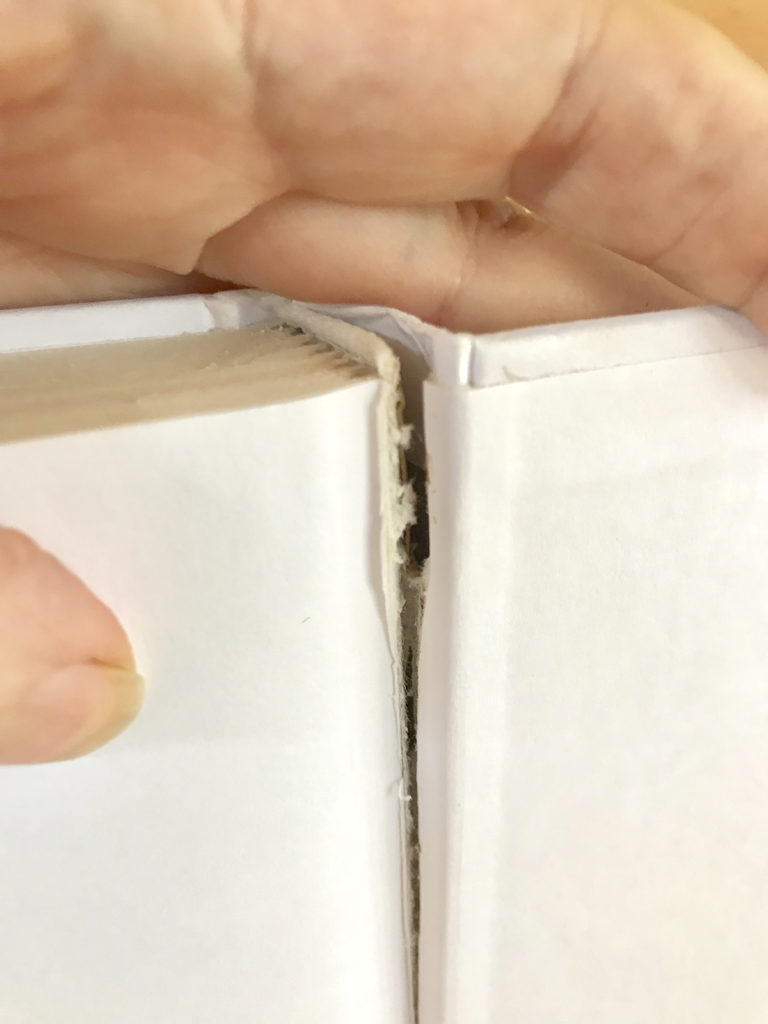
Then repeat the process with the back cover. It will be easier once the front cover is released! 🙂

Surprise Gift
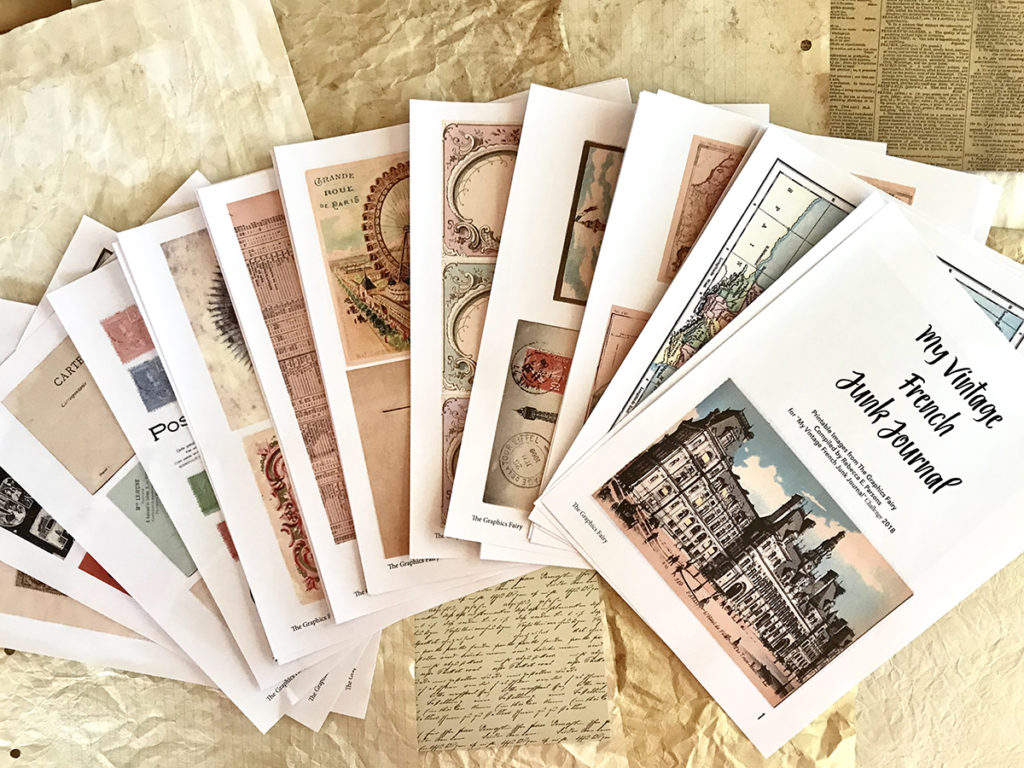
I have scoured the archives here at The Graphics Fairy to find some of the most amazing, beautiful vintage French images and ephemera to tell the story of our travels and place in our vintage French junk journal. Boy was this ever fun! Of course, you are free to peruse the The Graphics Fairy yourself (that is truly half the fun) and find the images you want to include in your junk journal. It is all good. I will give links to the graphics with each lesson!
ASSIGNMENT
- Complete three, 16-page signatures (4 aged papers folded in half and nestled inside each other) using the above techniques.
- Prepare your cover as directed above.
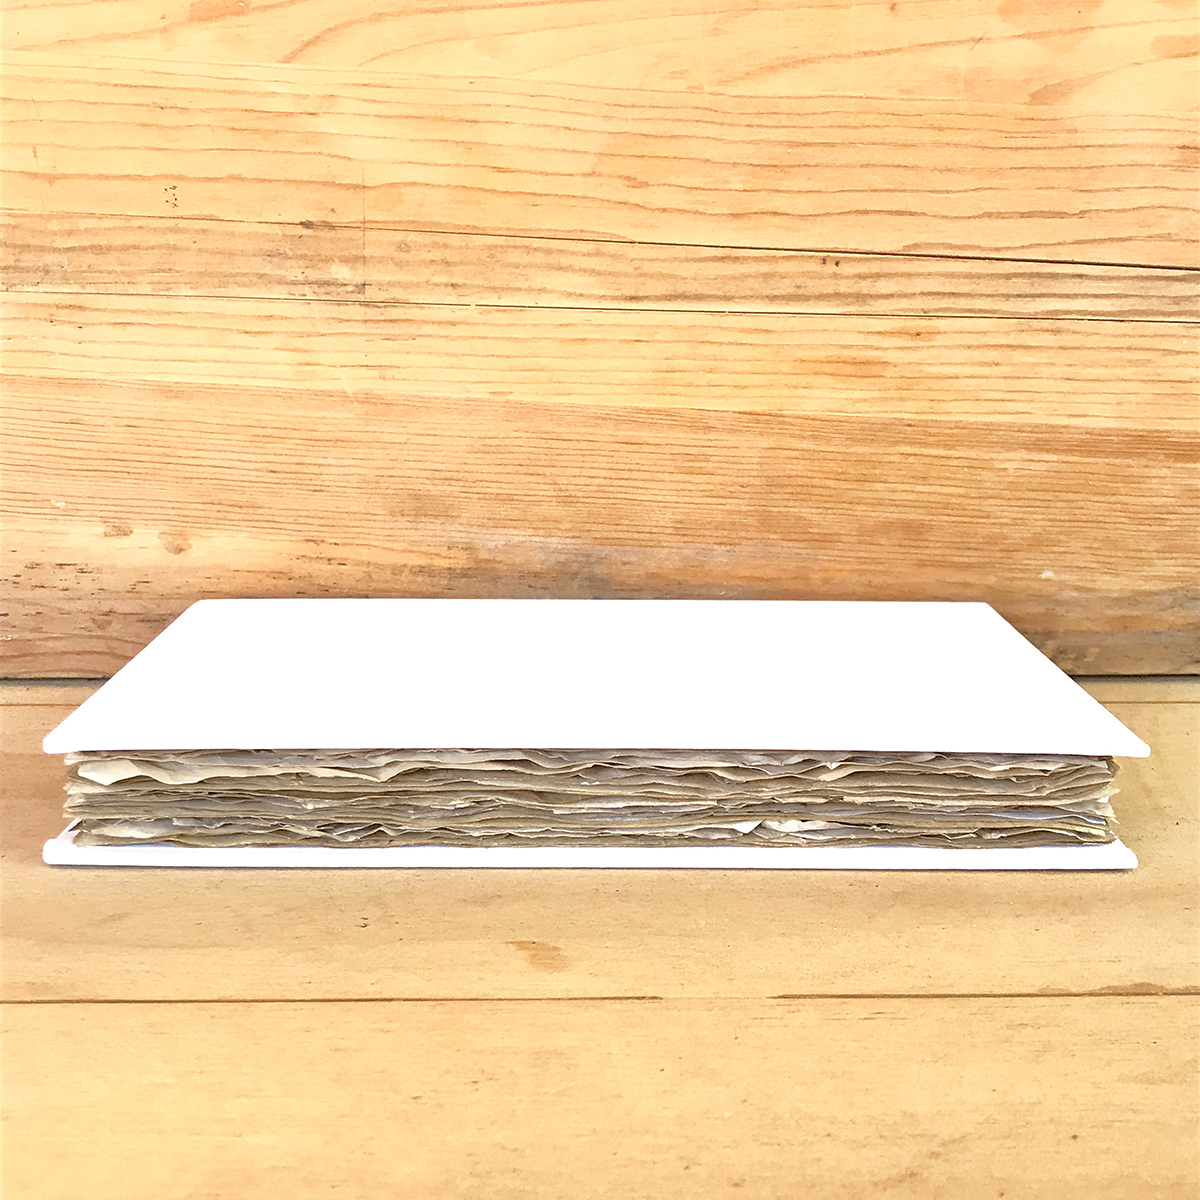
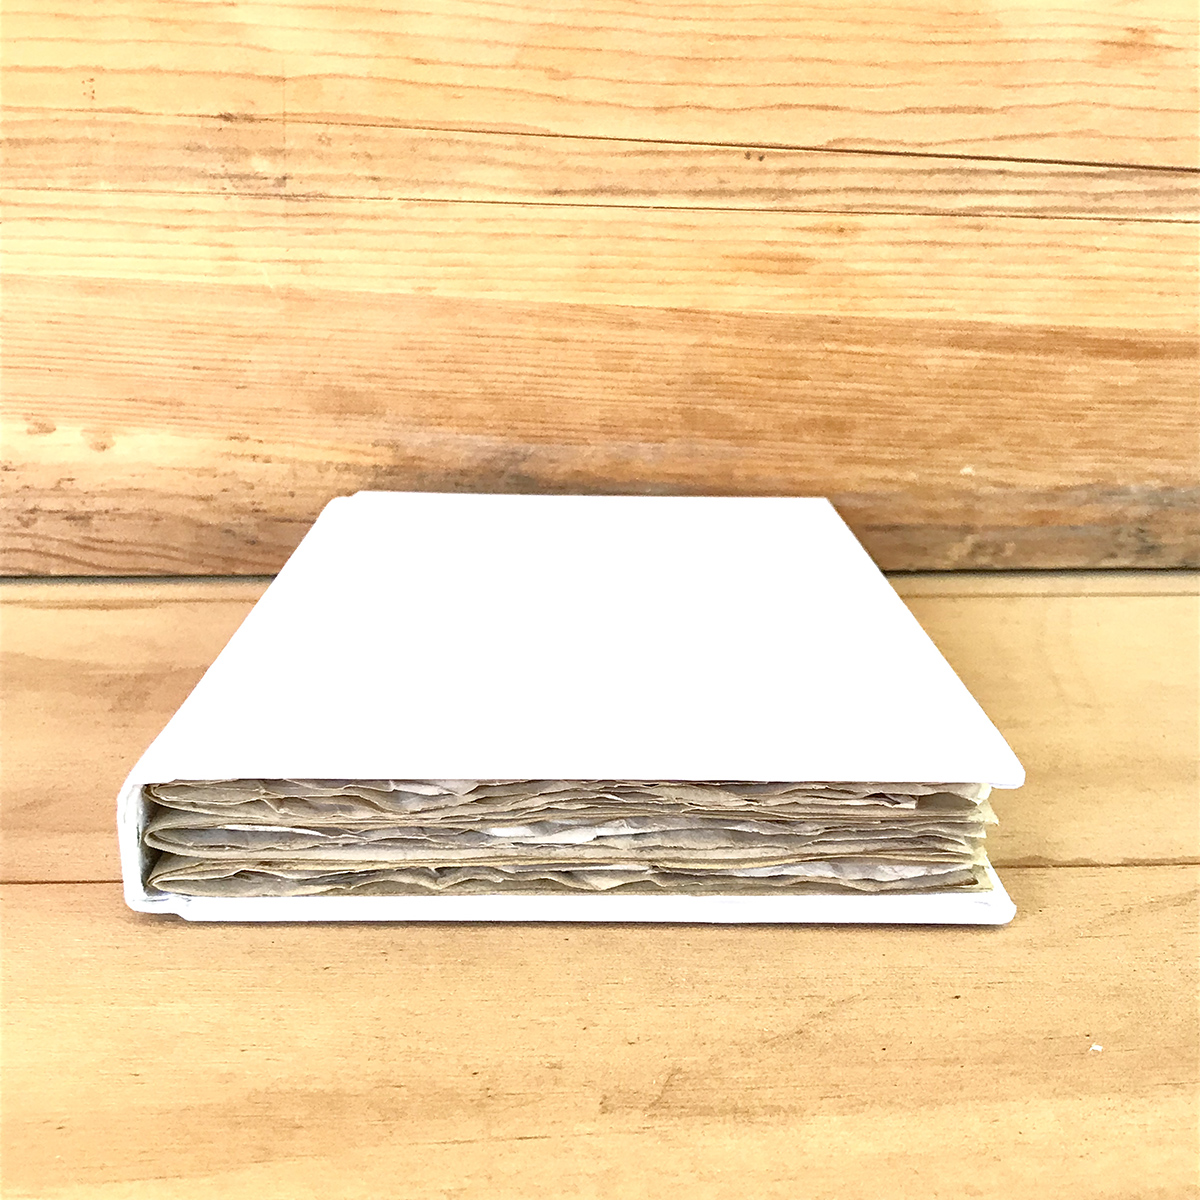
So I will see you back on the third week of June for our next tutorial, when we begin to embellish and add things to our pages. So gather some rubber stamps, stencils, paints, and embellishments and meet me back here with your pages ready to work on. Have fun aging the papers and getting your cover ready. You should have something that looks like the next two photos when we meet next time. The signatures are just laid in the cover for now. We will bind them into the cover after we decorate the pages. 🙂
Whew, that was a lot of information to start this class off. What do you think? Are you ready to Make Your Own Junk Journal with me?
Next Stop? Head on over to Part 2 of this series HERE.
I hope you enjoyed this Mixed Media Junket Journal Tutorial! I also teach Photoshop Elements tutorials over on The Graphics Fairy Premium Membership site. You can find even more of my art, DIYs, and whimsical shenanigans on Cre8tive Compass Magazine, Cre8tiva (just launched), and loads of my digital art on Instagram.
May joy be with you all,

Where To Buy Fairy Garden Supplies Near Me
Source: https://thegraphicsfairy.com/create-a-junk-journal/
Posted by: boozeyoring40.blogspot.com
0 Response to "Where To Buy Fairy Garden Supplies Near Me"
Post a Comment