

How To Put Flower Garden Quilt Together

I am pretty pleased with myself for having finished my Scrappy Grandmother's Flower Garden Quilt. I have so loved working on this quilt, from sorting through my fabric scraps and stash, to cutting hexies, glue basting fabric pieces to papers, and stitching hexagon flowers, to finally basting and quilting this quilt. It was a journey that played out over many long evenings with needle and thread, and one that I would happily repeat. I have lots of photos to share so please do bear with me!


I finished this quilt top in July and for all of the month of August the quilt top sat neatly folded in a corner of my sewing area. I couldn't decide if I should send it off to my long arm machine quilter or if I was game enough to tackle the quilting myself. Yes, I still worry with each quilt that I could mess up the quilting, especially so with larger quilts. Earlier this month however, I threw all caution to the wind and basted the quilt one afternoon, and started quilting the next day. And I am so glad I did!


I love the simple straight lines of quilting! The lines are spaced ½" apart and run from top to bottom edge of the quilt. It took hours and hours of slow stitching and quilt wrangling to complete the quilting but it was well worth the effort.


For the back of the quilt I have used a single white daisy design on a grey background. This is a Japanese fabric and the selvage reads: Favorite - Presented by Kei Fabric. I had been holding on to this piece of yardage for just the right project and this was it!


And I have finished the quilt with a red/white stripe fabric for the binding. Having spent so many hours hand piecing the quilt I thought it only appropriate to spend an hour or so hand slip stitching the binding.

QUILT DETAILS
Scrappy Grandmother's Flower Garden Quilt
The finished quilt measures 55 inches x 72 inches.
Started: May 2018 Finished: September 2018.
English Paper Pieced.
TOOLS AND NOTIONS
1 Inch Hexagon Papers
1 Inch Hexagon Template with 3/8" seam allowance.
Water Soluble Basting Glue - Sewline.
Straw Needles - Size 11.
The Bottom Line 60wt thread by Superior Threads.

SIMPLE CONSTRUCTION DETAILS:

MAKE:
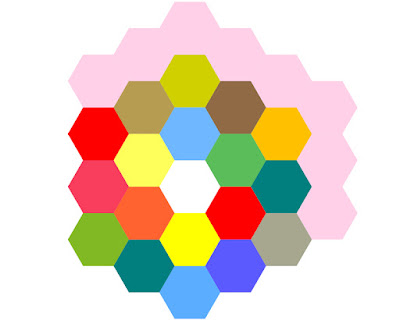
50 WHOLE Scrappy Grandmother's Flower Garden Units (pictured on the left).
8 HALF units for the left and right edges of the quilt (pictured on the right).
LAYOUT:
Lay out and arrange the Grandmother's Flower Garden Units in 9 horizontal
rows. Start row 1 with a whole Flower Garden Unit
and similarly end row 9 with a whole Flower Garden Unit.
(see photo of the whole quilt for guidance).
Pick up all pieces in order in rows - I like to keep each
individual row in a Ziploc bags.
PREPARE UNITS BY ADDING BACKGROUND HEXAGONS:
Then (row by row) start preparing the units for row sewing by
adding background hexagons:
as pictured above - for whole Flower Garden Units -
and as pictured below for left and right side half Flower Garden Units.
(4 half Flower Garden Units for the LEFT side of the quilt
and 4 half Flower Garden Units for the RIGHT side of the quilt).

SEW ROWS TOGETHER
Once you have prepared all the
units for the whole row, sew the row together.
Then join together horizontal rows.

Row 1 and row 9 will require additional background hexagons
to be added to fill in the top and bottom quilt edges.
Removing papers after you sew each row together will make piecing
much more enjoyable. Remove only those papers for which all six
sides of the hexagon have an adjoining hexagon.
Hexagon Papers and Fabric Requirements:
- A total of 1572 - 1 inch Hexagon Papers.
- Scrappy fabric for Grandmother's Flower Garden Units.
- 3 YARDS of background fabric* based on cutting 1" hexagons with 3/8" seam allowance - standard width quilting cotton (cut a total of 526 background fabric hexagons).

I hope that all makes sense? Please don't hesitate to email me (redpepperquilts@gmail.com) or leave a question/comment below if you have any questions or require further clarification.
Thank you for stopping by,
Rita

More RPQ English Paper Pieced Quilts:
Mandolin Quilt
Liberty Stars Quilt
Daisy Chain Quilt

Follow RPQ on:
COPYRIGHT: Do not copy or use any content or photos from my blog without my written permission. This is original content from www.redpepperquilts.com.
How To Put Flower Garden Quilt Together
Source: https://www.redpepperquilts.com/2018/09/a-scrappy-grandmothers-flower-garden-quilt.html
Posted by: boozeyoring40.blogspot.com
0 Response to "How To Put Flower Garden Quilt Together"
Post a Comment